Think of rate templates as different pricing table that you can sell to different corporate clients. For example you may want to sell a different price for hotel A vs hotel B.
You can create and manage multiple rate templates based on your business needs:
- A default rate template for public customers booking directly through your website or apps.
- Custom rate templates for corporate accounts, allowing you to offer discounted or negotiated pricing.
- OTA-specific rate templates for partners like Booking.com or HolidayTaxis, with separate price structures for each channel.
- Supplier/driver payout rate templates, used to calculate how much you pay suppliers or drivers instead of using a fixed commission.
Naming Conventions
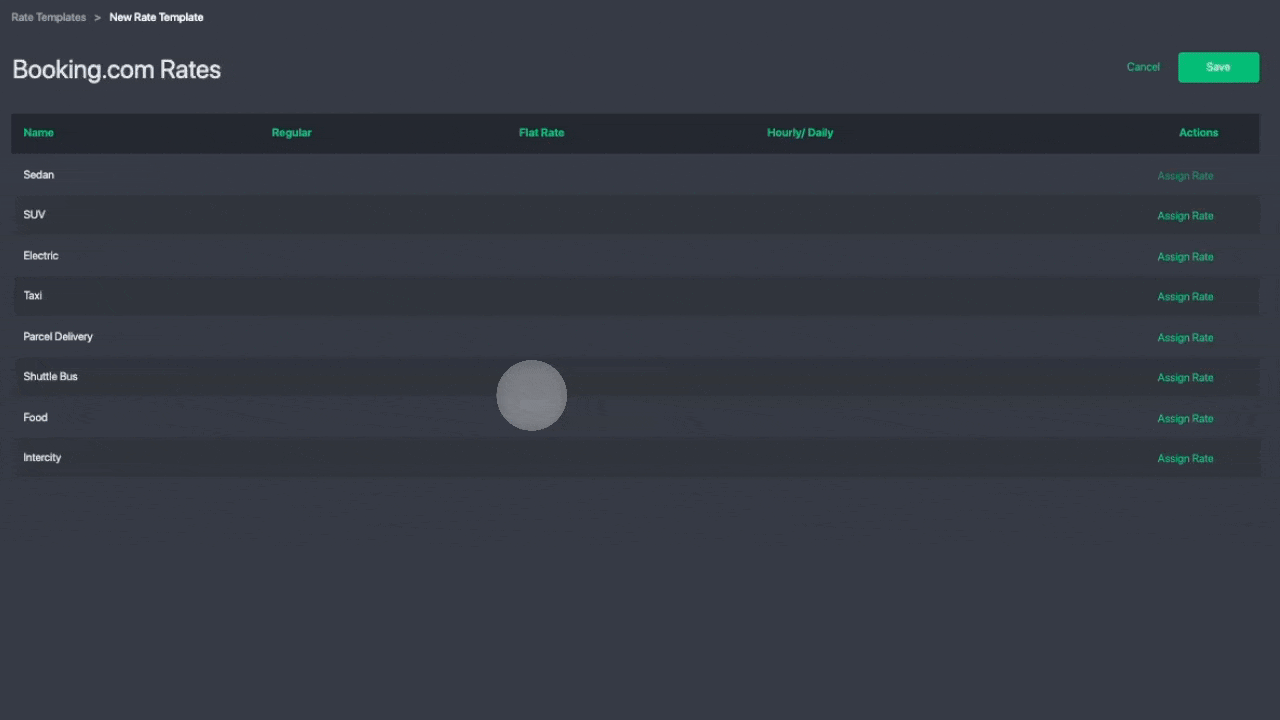
Below is a sample screenshot of rate templates created for different use cases:

A good naming convention helps you quickly identify the purpose of each rate template:
- Public Rate — used for customers booking directly through your website or apps.
- Corporate Rate – Corporate Name — helps you identify which corporate client the rate belongs to and the currency applied.
- Supplier Payout Rate – Supplier Name, Currency — defines how much you pay your suppliers or drivers.
Keep in mind that a single rate template can contain multiple rate types (regular, flat rate, hourly) and can support multiple currencies. It's up to how you want to manage your rates as you scale up your operations.
How To Create a Rate Template
- Click Add to create a new rate template.
- Enter a clear and meaningful name for your template.

- For each vehicle type you want to sell, assign the rates that apply.

- Choose a car-type you want to setup rates for and click Assign Rate.

- When you tap Assign Rate, a dialog will appear showing all available rates for that vehicle type. This is where good naming conventions become important. If your rates are named properly, you can simply multi-select the zones you operate in and choose the correct rate for that specific car-type.
- You can hold shift to multi-select zones, and click a rate to apply.
Pro Tip: If you’re creating a custom rate template for a corporate client and only want to sell Business or Executive car-type, then you only configure rates for those vehicle types. You can leave the rates for Standard or other vehicle types empty if they are not part of the corporate contract.
How To Setup Default Rates
The purpose of default rates is for your direct customers. Customers that book on your website, or passenger app. The system will pull the rates from the default rates.
Within the rate template action column, select Set as Default. For example if you want to setup a different rate template for Christmas as shown in the screenshot below:

How To Link A Rate Template To A Corporate Account
Sometimes you may have a negotiated price or contract with an OTA or a corporate account. In these cases, you can create custom rate templates and attach them directly to each corporate account’s policy.
- Go to Corporate.
- Open the corporate profile.
- Navigate to the Policies tab.
- Select the rate template you want to apply for this corporate account.
- (Optional) Adjust the vehicle lead time settings specific to this corporate client.

Was this article helpful?
That’s Great!
Thank you for your feedback
Sorry! We couldn't be helpful
Thank you for your feedback
Feedback sent
We appreciate your effort and will try to fix the article